Monday, November 18, 2013

Caramelized Almonds and or Pecans

Almonds, nuts, pecans, macadamias are my any time temptations, just about any kind of nuts drive me nuts. Here in Puerto Rico there are various  booths or carts that sell these caramelized almonds and walnuts in a small paper cone for $3.50 each . The smell of these caramelized nuts takes over the mall and start screaming out to me, buy me, buy me..please. And I end up buying the bag. Its been a pretty long time since I visited the mall because its about 30 mins (on the express) away from home. Soooo I made some research and found this recipe on a recipe sharing page on Social Network. I tried it out and they were great.


Its a great treat for your kids after school snack or even for a party. Take a chance at making them you will not regret it. 

Ingredients

1 1/2 Cup of Almonds, pecans, or just about any nut
1/2 cup of granulated sugar
1 tsp cinnamon powder
1/8 cup water

Put all ingredients in a saucepan, constantly moving with a wooden spoon.


 When it start to thicken, remove from the stove and pour over wax paper and let cool. Once cooled break in pieces. And tadaaaa! Ready to gubble up! Yum, Yum! Enjoy!

Love Victoria...


Almendras & Nueces Caramelizadas 

Almendras, pecanas, nueces, macadamians son mis mas grande tentaciones en cualquier momento. Aqui en Puerto Rico existen varios carrito en los centros comerciales que venden estas delicias, y cada vez que visito ese centro en especifico el olor que inunda los pasillos llamando a lo lejos que las compren. Como siempre yo sedo y compro mi paquetito lleno de nueces con ese rico aroma y sabor a caramelo, Ummmm, Dios que delicia. Aquí les comparto una receta que conseguí en una pagina de una red social que comparte recetas y la probé y de veras que esta super rica.

Ingredientes

1 1/2 tza de Almendras, pecanas, o cualquier nuez
1/2 tza de azúcar granulada
1 cdta canela en polvo 
1/8 tza agua

Coloca todos lo ingredientes en una sarten a fuego moderado, tan pronto comience a espesar, retírelo del fuego y vertir sobre papel encerrado o de hornear. Dejar enfriar. Ya refrescadas, las picas en pedazos y a disfrutar!

Bendecidos,
Victoria

Wednesday, August 21, 2013

Shortbread Chocolate Roll Out Cookies


UMMMMMMmmm Chocolate, who doesn't love a little chocolate here and then? Just to mention the word  CHOCOLATEEEE, ummm just imagine, turn my mouth watery.  My kids die for chocolate in everything I can bake and I'm a freak for shortbread, just put them together and get an explosion of a cookie. But today I want to bring a special and simple cookie recipe: "Chocolate Shortbread Cookies".


Ingredients

2 1/2 cups All purpose flour
1 cup sugar
1/4 tsp salt
2 bar of butter
6 oz of semisweet chocolate melted and refreshed
1 tsp vanilla extract

Cream butter and slowly add sugar, do not over beat. Add cooled chocolate and beat to incorporate well. Mix in vanilla and flour, Mix to incorporate, Remove from bowl and cover in plastic wrap and refrigerate for at least 1 hr to overnight.

Remove, roll out and cut with your fav cookie cutter. Place on prepared baking sheet with parchment paper and refrigerate for about 15 mins. Bake 350F for 7-10 mins.

These cookies are really chocolatey tasty for the chocolate lover in you.  So go ahead and enjoy them!!
Happy Baking,  I would love to receive your comments and questions.

XOXO,


Espanol:

Ummmmm... Chocolate.... A quien no le gustaria un chocolatito de vez en cuando?  Ummmm Chocolateeeee, nada mas mencionarlo se me hace la boca agua. En casa mis hijos les encanta el chocolate en todo lo que pueda yo hornear. Sin embargo a mi me encanta el "Shortbread" y cuando los mezcla es una explosión de galletita. Pues aqui les traigo una recetita simple y facilita de hacer. 

Ingredientes:

2 1/2t de Harina todo uso
1t azucar 
1/4 cdta de sal
2 barras de mantequillas
6 oz de chocolate semi-sweet derretido y refrescado
1 cdta vainilla

Cremar Mantequilla y la azúcar sin sobre batir, añadir el chocolate refrescado y mezclar. Mezcle la sal con la harina.Añada la vainilla y la harina sin sobre batir solo hasta desaparecer la harina. Remover del envase y envolver en "Plastic wrap" y guardar en la nevera por lo menos 1 hr o hasta 24 hr. 

Sacar de la nevera, 
estirar y cortar con su cortador preferido.  Colocar en una bandeja previamente preparada con papel de hornear  y volver a la never por 15 mins mas. 


 Luego hornear a 350 F de 7 a 10 mins. Dejar enfriar bien antes de decorar. Estas galletitas son super chocolatosas para nosotras las adictas al chocolate. Asi que adelante disfruta unas cuantas!
Para cualquier duda o pregunta, dejame un comentario abajo, Me fascina recibir los!!

XOXO


Friday, August 2, 2013

Basic Sugar Cookies


        Lately I have been making lots of decorated sugar cookies for different activities, and on every picture posted on my facebook page I get various request for the recipe of these sugar cookies. I didn’t have the time before because of all the work and since my kids are on summer vacations, they take up lots of time. Tonight I put my foot down and decided to take some time out and give all these wonderful women a good recipe to start off.


 Ingredients:                                                             
1 ½ bar of butter                                                    
1/3 cup of granulated sugar                              
¼ tsp salt                                                                   
1 ½ tsp vanilla                                                         
2 egg yolks                                                               
2 ½ cups of all purpose flour                              


Cream butter and sugar until light and fluffy.  Add in vanilla and yolks, one at a time. Mix flour and salt and slowly add to butter mixture scrapping down. Do not over beat.

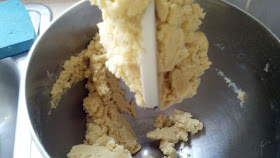
Good Consistency

Remove your dough and cover with plastic wrap in the fridge for at least 1hr.  


Remove from fridge roll out and cut out your cookies . 
This I made using my homemade cutter, if you like to learn how to make your own cutters, click here.


Place on a baking sheet with parchment paper and bake for 7-10 mins until golden edges at 350F.

This is my basic recipe, the one which I started with and over time I have made different adaptions and changes to make it my very own.  Hope you can adapt it to your taste and make it more wonderful. I Love making sugar cookies, they are my favorite. Hope you have as much fun as I do.  Please do leave your comments and any questions you may have below. I love to receive them.  Love…….

Victoria...

Espanol:
Galletas de Azucar


Últimamente he estado hacienda muchas galletas decoradas para diferentes actividades, y en cada posteo en mi pagina de Facebook, recibo muchas solicitudes de la receta de estas delicias. No había tenido tiempo para hacer este posteo por falta de tiempo y trabajo.  Además que como los chicos están de vacaciones y me ocupan bastante tiempo. Pero hoy decidí tomar un ratito para postear esta recetita para todas esas maravillosas mujeres que quieren comenzar hacer galletas.


Ingredientes:

1 ½ barra de mantequilla
1/3 taza de azúcar granulada
¼ cdta sal
1 ½ tsp vainilla
2 yemas de huevos
2 ½ tazas de harina todo uso

Cremar mantequilla y azucar hasta bien unida. Añada vainilla y las yemas una a una. Mezclar harina junto con la sal y añadir a la mantequilla poco a poco raspando el bowl. 

Debe quedar de esta consistencia

Remover masa y envolver en plástico y refrigerar por lo menos 1 hra. 


Cubrir con Plastic wrap 

Sacar de la nevera, estirar y cortar con sus cortadores preferidos. 


  Este fue uno hecho por mi y si deseas aprender hacer tus cortadores, busca tu tutorial aqui.


Colocar en bandeja con papel encerado y hornear a 350F por 7-10 mins o hasta que se doren levemente las orillas. Dejar enfriar por 10 min en la bandeja.


Esta fue la receta con la que comenze hacer galletas y con el tiempo fui haciendole adaptaciones hasta hacerla mía, a mi gusto personal. Espero que puedan adaptarlas a su gusto tambien.  Disfrutomuchísimoo hacer galletas, tanto que las haría todos los días. Espero que puedan disfrutar hacerlas tanto como yo. 


Favor dejar sus dudas, preguntas o comentarios abajo.  Es un placer recibirlas y me animan a seguir escribiendo para ustedes. Cariños….

Victoria.....

Monday, July 22, 2013

Gluten free choco chip cookies

Yum, yum, yum..


Yum.... Every time I just imagine my choco-chip cookies I just drool all over. But recently I have been thinking about my kid which is diabetic and I don't now much about the gluten free subject but I have heard that its better for people specially if they are diabetic. So I started looking for info on how to make cookies for him.

One day I'm at Marshall's (my fave store by the way) and saw they had gluten free all purpose flour.  Read the box and it said to change one on one, in other words 1 cup of regular all purpose flour for 1 cup of gluten free flour. I said well that's not so hard so I bought a box to give it a try.

 And it happens that the next day I returned to buy all the rest of the boxes left, there were only 4 boxes left, so took them all. Love this flour its awesome.


These cookies came out marvelous. I wanted to share the recipe but you may use any recipe you have that you'd like to change.

Gluten free Chocolate chip cookies

1 1/2 cup butter or margarine, softened
1 1/4 cup brown sugar
1 1/4 cup granulated sugar
1 tsp vanilla extract, I use vanilla beans
2 eggs
4 cups Gluten free flour
2 tsp baking soda
1/2 tsp salt
1 bag Chocolate chips

Mix together flour, salt and baking soda. Set aside. Beat butter and both sugars until creamy. Add vanilla extract and eggs, beat until light and fluffy.  Lower the speed on your beater and slowly stir in the flour mixture.  Mixture will be pretty heavy and thick. Stir in Chips. You may use right away or leave in the fridge for a 30 min period. I prefer to wait a bit I think they taste better after waiting.


 Prepare your pan with parchment paper, and spoon drop your batter on the pan. Bake at 350F for no more then 10 mins (if you like your cookies soft inside and crisp on the edges.


These came our a little puffier but with the same great taste as my regular ones. So I advise you to give them a try.  Please let me know your reaction to them.  If you have any question just leave a comment below.

Love Victoria


Saturday, July 20, 2013

Ruffle Cake Technique Tutorial

Oh Ruffles, I just love ruffles since I was a little girl. I loved them on dresses, on stockings, on shoes and just about on anything. Its a girl ruffle thing?  And since I learned ruffles could be made on baking goods like cakes, cookies and cakepops, I have gone wild with this technique. I love it sooo much that every cake that is for a gal and just don't have like a theme I make it a ruffle cake.

If you'll like to become a freaky ruffle decorator like me here is a tutorial so you may do so...

Tools:
Cake ( already crumb coated)
Piping bag
Tip 104
Buttercream or Frosting of your choice
Turn table (Lazy susan)

First thing is to have your cake crumb coated very lightly. This is because if it is not coated the crumbs will begin to stick to your piping tip and or start to fall off, and also if your ruffles aren't to close together the crumb part wont show thru.


Take your piping bag already fitted with the tip and touching (with the wider part of the tip) the cake where you would like to begin, start by squeezing the bag and giving it a up and down motion at the same time you move your turning table if you want the ruffles side way like in the picture above.


Now repeat the same step until you decide where you like to stop.


The more ruffle you add to your cake the more beautiful it will look.


On the top you may want to leave it with out the ruffles and add some detail or what ever you like, but I just decided to keep going and going....


Doesn't it just look beautiful just like it is??? yeah but I just wanted to add something more girly to it and my favorite thing after baking, Shoe! Yes a cupcake shoe, just love it.


Cupcake Shoe and Sprinkles, what better things to add???

Hope you enjoy making ruffles on everything you can get your hands on too!  Good Luck with it and if any questions just leave me a comment. 

Love Ya!!

Victoria

Wednesday, July 17, 2013

Do your cakes stick to the pans??? Well not anymore!

Have you had one of those days that your cakes stick to the pans even when you have used everything in the market to prevent from sticking? Well I used to have those days and even cried about it because I had used everything I could think of to prevent it. Well not anymore! Nope not anymore!! I have used this recipe for a few months now and its great and cheaper than the commercial version.  I don't have to use the parchment paper in the pan anymore and that makes an extra saving to my pocket. 

So let move on to this magical buttery non-stick potion, yeah that the best name for it.

Ingredients:

1/4 cup of Crisco
1/2 cup vegetable oil
1/2 cup All purpose flour
1/4 cup melted butter or margarine

Just mix everything up very well and tadaaaa! Ready to use. Keep in the fridge. 

Try it out and your will remember me. Please leave your comments or questions. Thanks and Be Blessed!

Victoria


Spanish/Espanol

Has tenido uno de esos dias donde por mas que le untes de todo a tus moldes de hornear, tus bizcochos se pegan? Ohhhh siiii yo los he tenido pero ya no mas! Hace varios meses estoy utilizando esta receta y es maravillosa, tanto que ni siquiera tengo que usar el papel para horneo en los moldes y esto es un ahorro adicional a mi bolsillo. Esta receta es mas economica que comprando la version commercial, la cual en ocasiones se me pegaban los bizcochos.

Asi que vamos a la mantequillosa magica receta, si ese seria un buen nombre para ella.

Ingredientes:

1/4 T de Manteca Crisco
1/2 T de aceite vegetal
1/2 T Harina todo uso
1/4 T de Mantequilla o Margarina derretida

Solo mezcla todos los ingredientes bien y Tadaaaaa! Lista para usar. Conservar en su nevera despues de usar.

Bueno Amig@s espero que la prueben, se acordaran de mi! Dejenme sus comentarios. 
Bendecidos siempre!
Victoria
 

Saturday, February 16, 2013

Playing Around With Cookies

      OMG my teenage daughters are driving me Nuts!!!! Yeah! Nuts I sad! How do I work with them? My little girls have grown up and I'm always trying to involve them in different activities with me and around me, so  I may keep a close eye on them. Well you know 14 year old girls? Not easy but trying to make the best as being a divorced mom and trying to earn their trust in me. Well trying to get them to be closer to me and share activities with them... I thought of cookies! Yes Cookies, decorating cookies and how they would enjoy playing around with them I came up with this idea!
"Cookie Games" 


Yes, Games on a cookie! I made different game on cookies and the girls played and marked or colored them with edible markers.  The first one was a tic tac toe cookie. 


This was my second idea and made a color by number cookie. While they colored and played,  they ate the Love one and the Lets play cookies. And for the last one...


Join the dots... I used to LOVE this when I was a kid, it was my fav.  These were super easy to do. The fun didn't last long because they ended up eating them but it was worth seeing them playing and taking time to enjoy something together like family should do. 

Hope you can enjoy some time with your kids no matter what their ages are, always try to involve them in your activities because they grow up fast and leave.  Sorry for the bad pictures, all I have is a small digital camera and trying to save up for a good one.